Quick and easy installations are standard with Mountain Laurel Handrails! Railings are preassembled and easy to install which helps to reduce labor costs. You provide us with your actual measurements. Sections are built an inch or so longer than actual and you cut to fit when they arrive on site. We deliver directly to your jobsite saving you time!
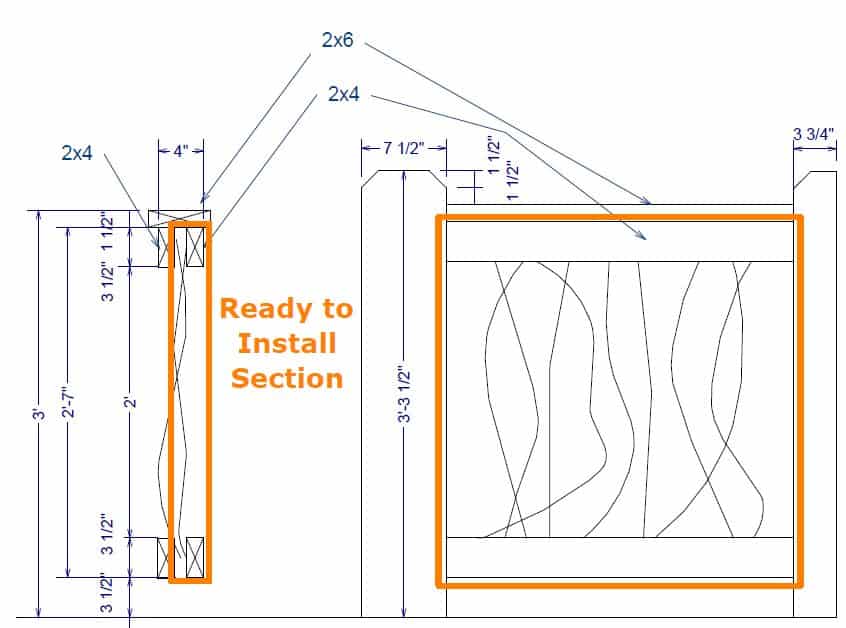
This drawing illustrates a section of Mountain Laurel handrails, highlighting the intricate design and quality craftsmanship involved in their creation.
How to Measure for your Handrails
The first step in ensuring your Mountain Laurel Handrail order is precise is with accurate measurements. For new construction, measure from post to post. For an existing home, you’ll also measure from post to post. It’s often possible to save the top rail of an existing guardrail. You’ll need to measure from the deck to the bottom of the top rail so that the handrail sections can fit underneath.
Your handrail sections will arrive slightly long so they can be cut to fit on site. This ensures a good, tight fit. Mountain Laurel Handrails sections are built so that the finish height is 36″. This height complies with most building code requirement but local regulations may vary so make sure to check with your local code enforcement official if you have any questions or concerns.
The typical lumber is cedar 2×4 and this works well for 6×6 and larger posts. You install the sections and then install an additional 2×4 to make a sandwich of the ends of the sticks. When the installation is complete, the cross section width is about 4.5″. For 4×4 posts, we use 1×4 lumber, you install, then put 1x4s for the sandwich boards and the finished width is about 3″.
Typical section height is 31″. This gives you 3.5″ off the finish floor plus 1.5″ for a 2x top cap to finish at 36″. For 42″ overall section height, we build the sections at 37″. With 3.5″ off the finish floor plus 1.5″ for a 2x top cap, this will finish at 42″. There is a $10/lf additional cost for 37″ sections.
Railings are built to meet common code requirements like the 4″ sphere rule and can withstand more than 65 pounds per square foot on the weave. Since building code varies by jurisdiction, I recommend contacting your local code enforcement official with any questions or concerns before placing an order.
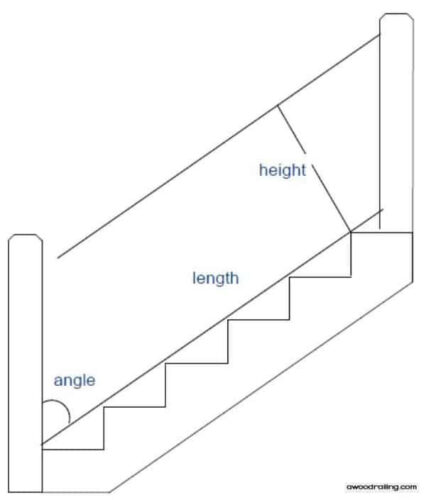
To measure for stairs, you’ll need to check the length from post to post, the height from the bottom of the bottom rail to the top of the top rail and the angle of the stair’s rise. You can use the drawing to measure for your mountain laurel handrail. With these simple steps you’re ready to get started today on your project!
Stairs can be built with the stairs inline or on the side of the stringers. If the posts are inline, the lower rail of the handrail will touch the tip of the stair tread. If the posts are to the side, the handrail can attach directly to the stair stringer. This is a great look that obscures the side of the stair.
How to Install your Railings
Mountain Laurel Handrail preassembled sections are built according to your post-to-post measurements and the 2x4s are left one inch long. When the order arrives, rest sections on 2×4 blocks on edge, scribe the ends of the top and bottom rails to match the posts, slide the section into place and fasten with screws. 1×4 are installed with finish nails to sandwich the ends of the sticks at top and bottom. To finish, a 2×6 is installed as a top cap, placing all screws and fasteners to be hidden.
Installation Instructions
Remove sections from package.
Place 2×4 blocks on edge by posts.
Place sections on blocks by posts.
Mark ends of sections and cut to fit.
Slide sections into place.
Screw to post with appropriate size screw.
Cut 1x4s (not included) to size.
Use finish nail gun to nail 1×4 into fatter diameter sticks.
Screw or nail to posts.
Cut 2×6 top cap (not included) to length.
Use trim head screws and angle upwards through the 2×4 and 1×4 into the bottom of the 2×6 for a fastener free top.
Also screw the 2×6 into the posts as possible.
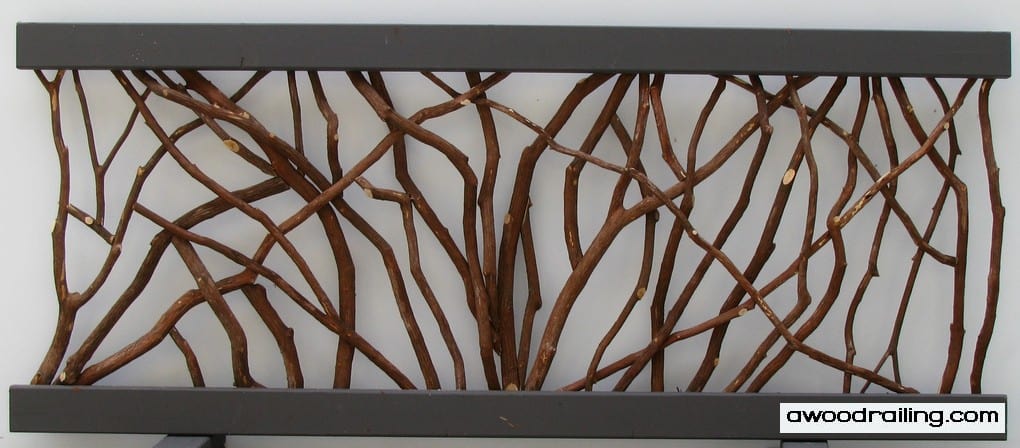
Pictures of Preassembled Sections
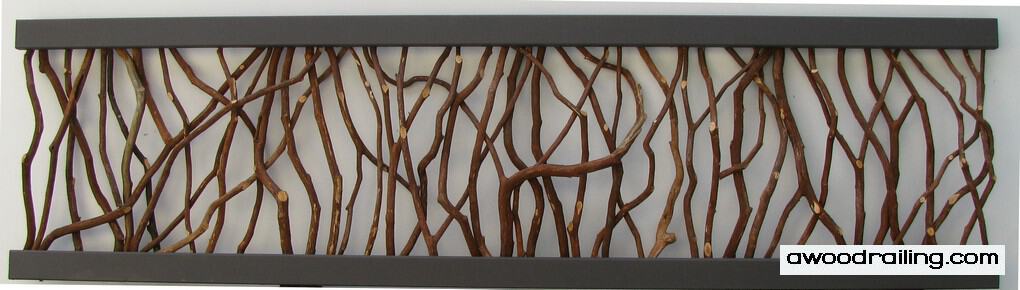
This is how the handrail sections look when they arrive at your house. They are ready for installation and only need to be fastened between the posts. This easy to install handrail system is a great way to quickly add mountain charm to your home.
The image below is one of the first handrail sections made for this home. Mountain Laurel Handrails arrive pre-assembled, painted and finished so all you have to do is put them in place! It is an easy solution for your home.
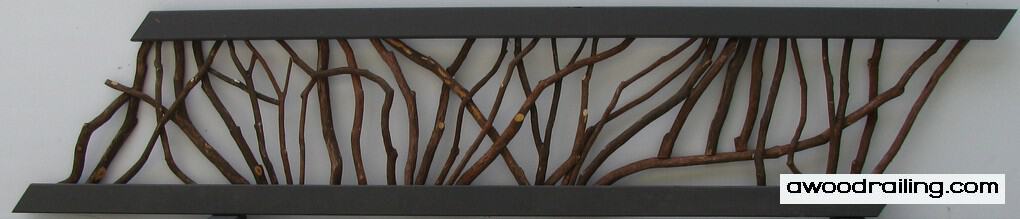
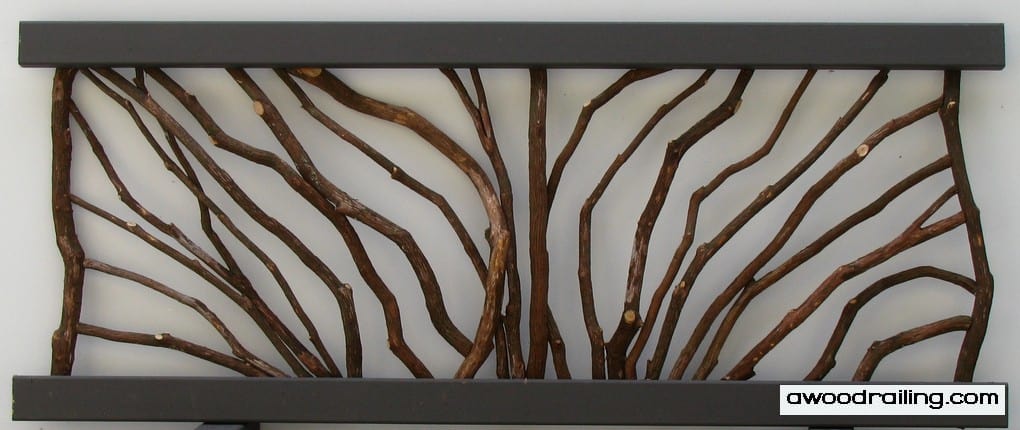
This next section of railing is designed for use on the slope of the stairs. It is carefully measured and cut to fit your precise measurements. These sections are very easy to install. Below is another section for the slope of the stairs. Notice how the sticks seem to flow with the angle of the handrail.
This next picture shows the more common handrail section meant for flat surfaces and not traditionally used on the slope of stairs like the sections in the previous two pictures. Mountain laurel handrails look great in any setting; inside or out.
These Mountain Laurel Handrails come easy to install and look great. If you are thinking about adding a rustic look to your home, Mountain Laurel handrails are a perfect fit.
Mountain Laurel Handrails can come in all different shapes and sizes and suit just about any home environment. The installation can easily be completed in no time at all.
This next handrail is a prime example of the ‘Sunburst’ design that is perfect for the centerpiece of any handrail design. This is just one of many custom designs that make Mountain Laurel handrails a perfect fit for your home.