The designer requested a special cedar framed gate, of cedar beams and mountain laurel branches with a somewhat gothic feel to the curves. Read on to learn how we built a mountain laurel branch and cedar beam framed gate.
Initial Gate Plans
Request a Product Guide and Pricing Info
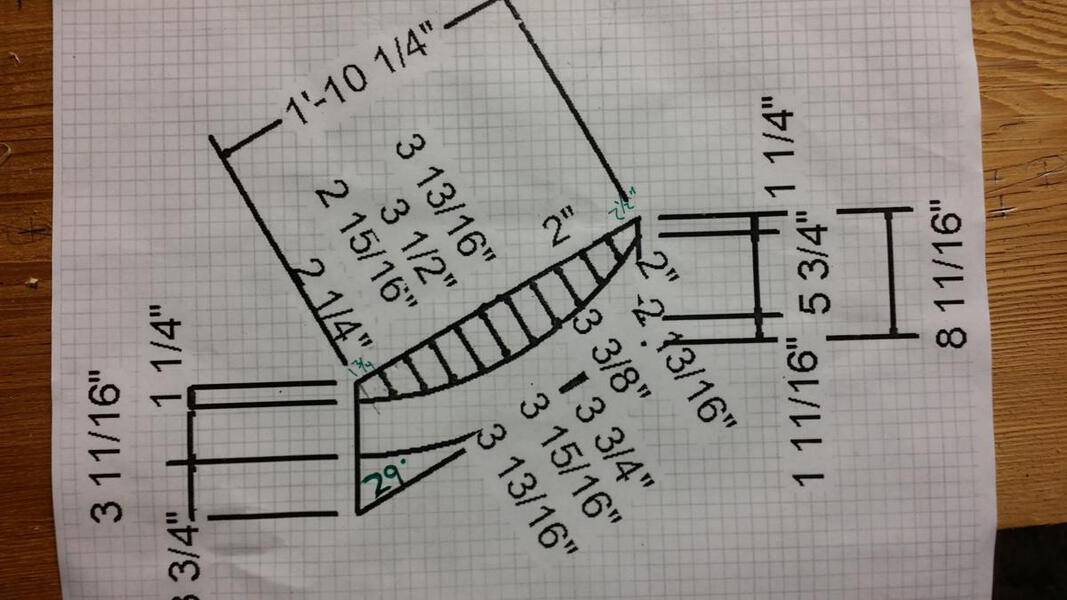
The initial gate plans were pretty well detailed but still lacked some crucial measurements.
Gate Measurements
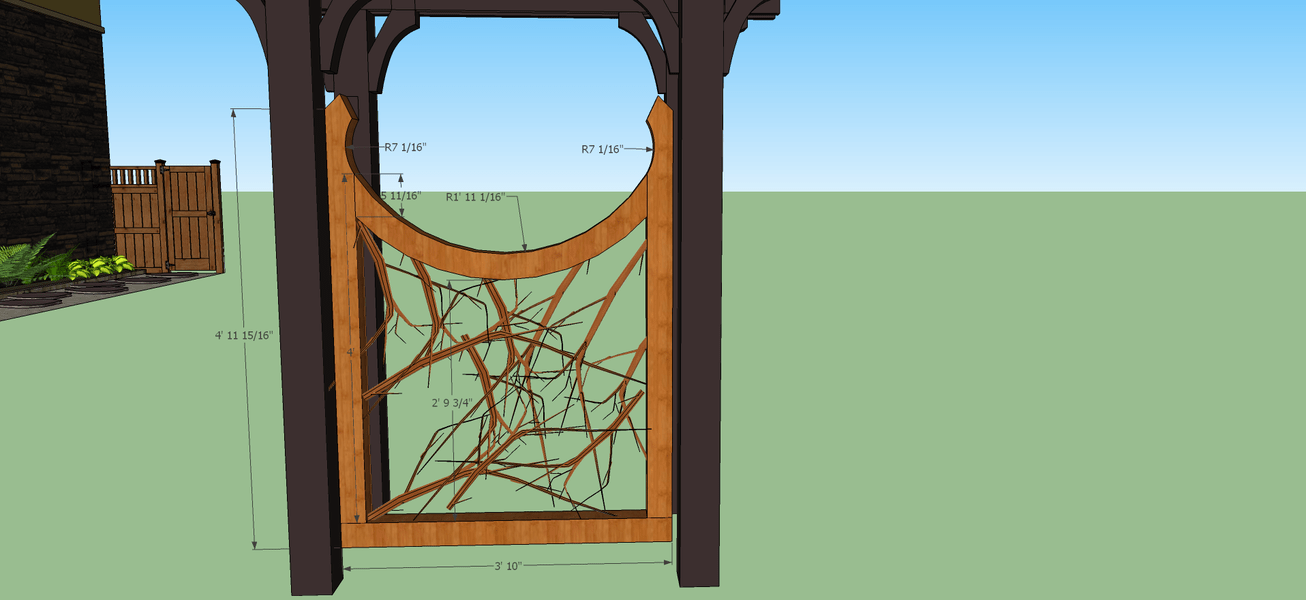
To make sure that the finished product matched the design, I requested more measurements. This allows me to transfer the designer’s idea into a more precise CAD drawing that can be used in the shop.
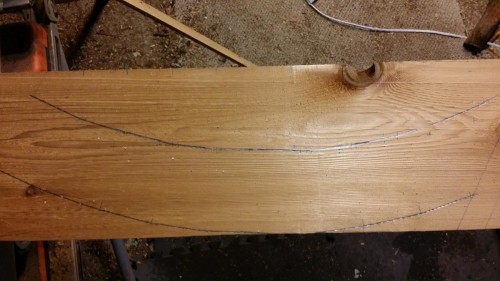
Curved Gate Plan
The curve in the upper beam is obviously the most crucial part of the whole design so this was the most detailed part of the cutting. Precise drawings like these allow for accurate layout. This is much better than freehand. For the smaller curves on the upright posts, I will uses a thin piece of lumber and bend it as desired, but for accurate curves, accurate plans and layout are required.
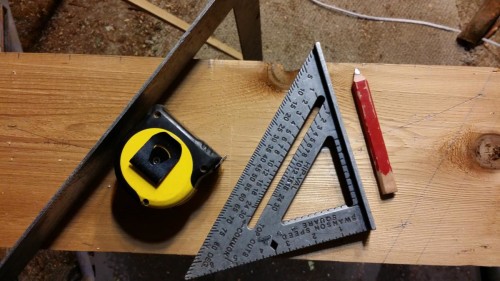
Tools for Marking Curves
Simple tools for marking simple curves. The most important part is measured patience. :)
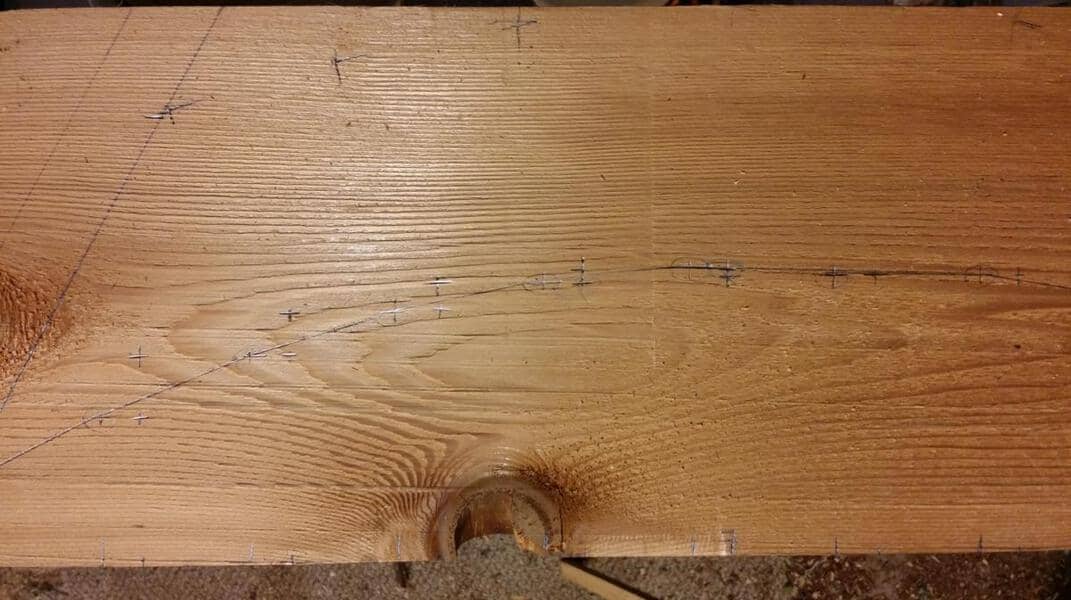
How to Mark Curves on Wood
Marking consists of plotting points on the piece of lumber. Start at one end and measure and mark.
Curve Marked on the Piece
The marks can be connected freehand to achieve the best curve. Draw lightly to start until you’re satisfied. Your pencil will often get caught in the wood grain.
Request a Product Guide and Pricing Info
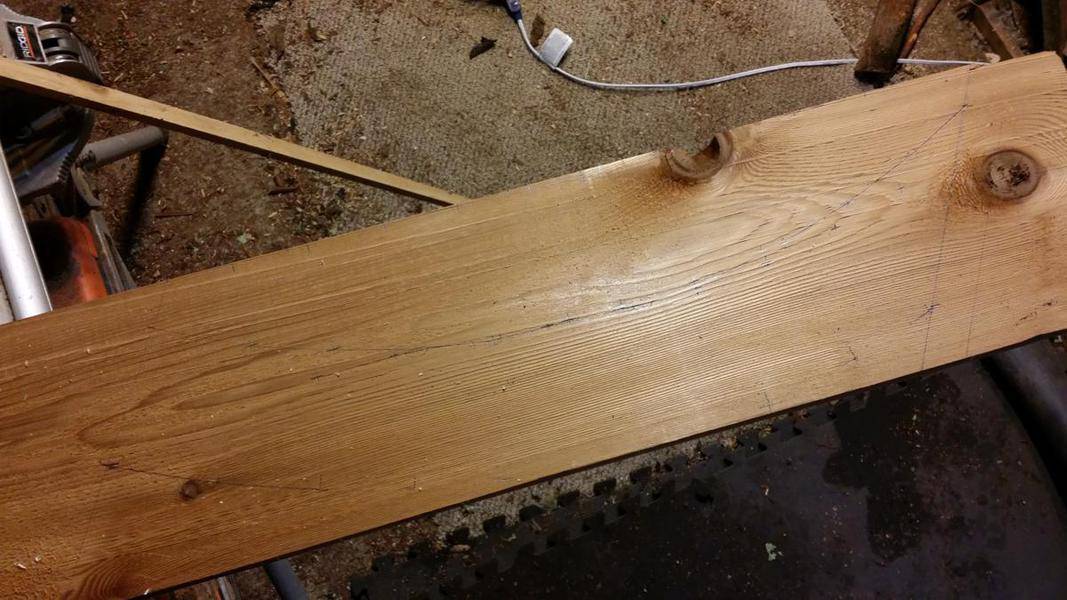
Marked and Ready to Cut the Curve
Darken up the marks so that you can see them and the marked piece is ready to cut on the bandsaw.
Starting the Bandsaw Cut
Start the bandsaw cut on a square edge preferable to starting with a shallow cut. It’s easier to end on the shallow side than it is to start on it. If you do have to start on the shallow side, turn the piece perpendicular to the saw blade and cut a very shallow, like 1/32″, notch right by the beginning mark. This will give you something to start the cut.
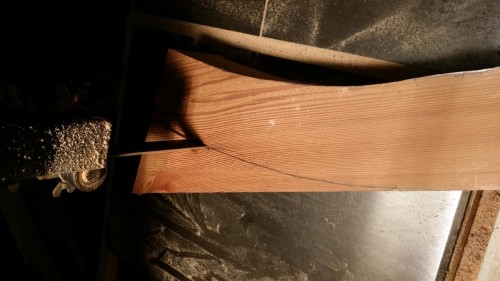
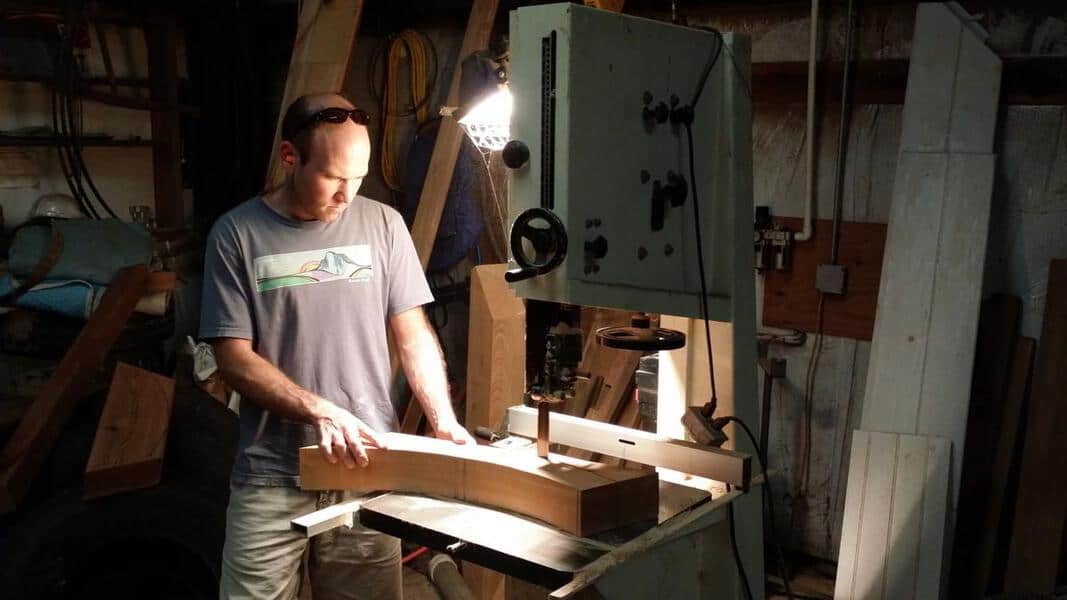
Cutting a Curve with a Bandsaw
Push the piece through the bandsaw slowly. Slower cuts will produce better results but don’t dawdle either. Good lighting makes the work much easier. I had my earplugs but I really needed a dust mask also.
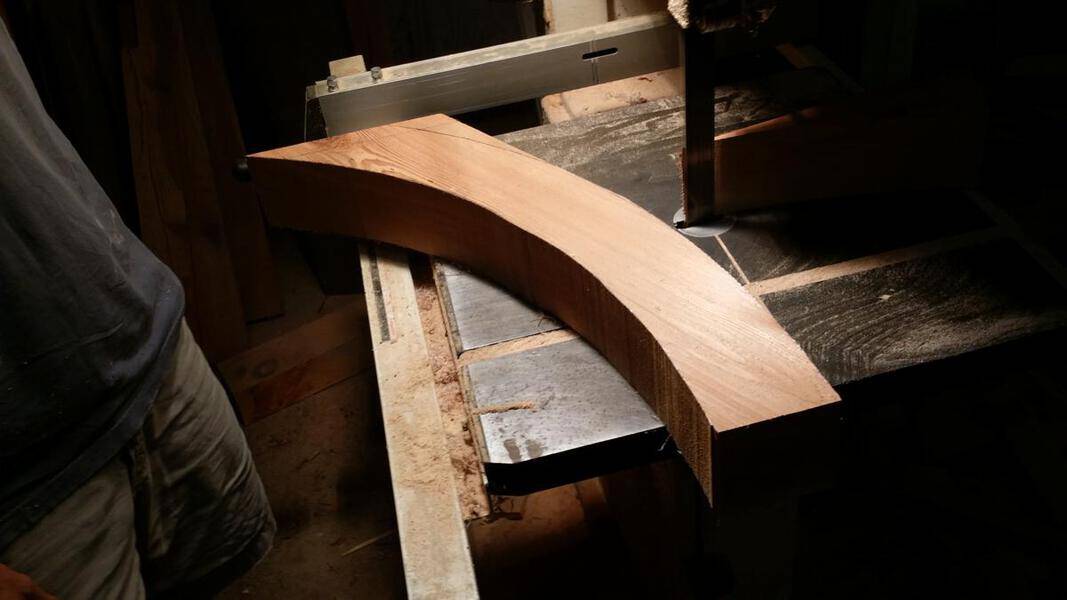
Bandsaw Cuts Almost Complete
Only one more chunk of wood to cut out! (of this piece…)
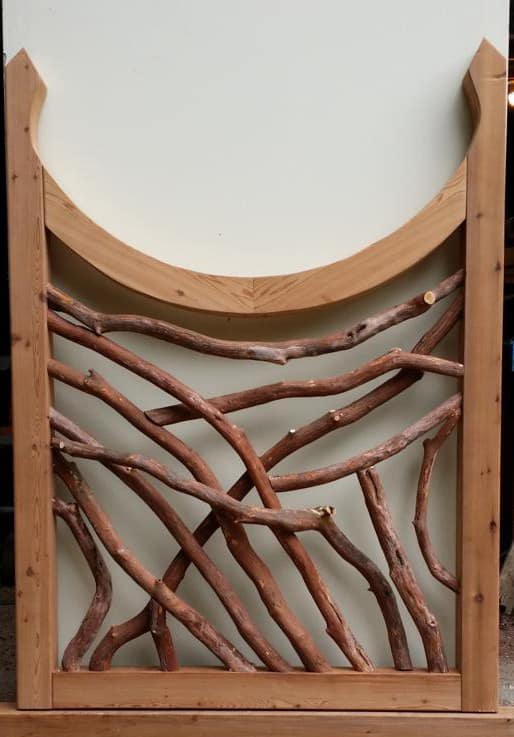
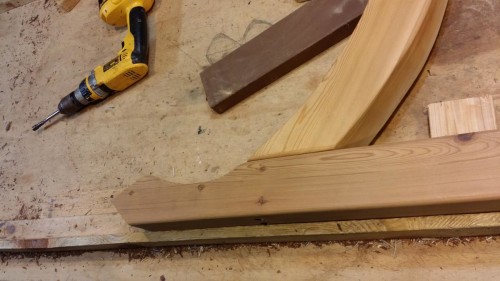
Assembling the Gate Pieces
Work on a flat surface to put the frame together. The center arch was assembled and screwed and glued and allowed to set prior to construction the frame. Timberlock or similar timber style hex head screws are my preferred fastener for timber. They are very strong and durable. Generally, they don’t need to be piloted but you may want to counter sink them. I drilled pilot holes and did a countersink on these due to the nature of the work.
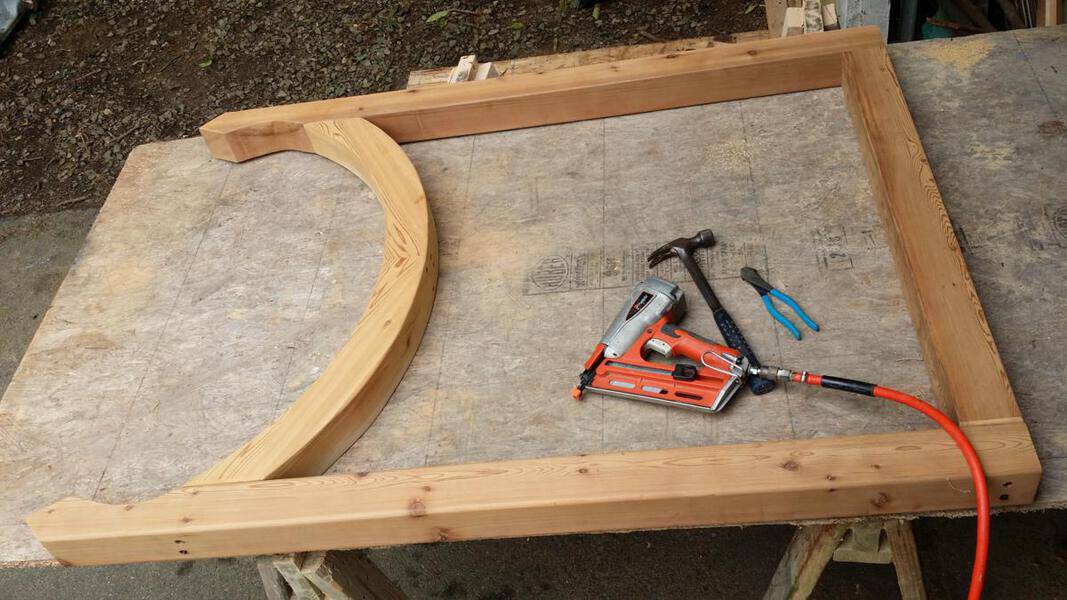
Cedar Gate Frame Assembly
Once the frame is done, we start putting mountain laurel sticks. These are all flush cut exposed which means that each end of the stick is going to be visible and one or both ends have to exactly match the square cut timber. Ask a carpenter: it’s difficult to join round pieces to square ones. For the heavier works like this gate, we use a larger diameter, like 1″ to 3″, mountain laurel branch than would normally be used for making handrails.